This year for history we are studying all about our home state of California. There is such a rich history we will be learning about and we are so excited for lots of great books and fun field trips! We are using Around California with Children’s Books by Beautiful Feet Books as our curriculum spine, but of course I can’t help myself, and am always adding lots of fun projects and activities. You can read more about the curriculum and find all the books we are using (as well as our other family studies) HERE.
To start the school year, and before we even start the curriculum, I wanted my kids to learn some basic facts about the state and focus on its geography. I searched Pinterest, Teachers Pay Teachers, and came up with a few ideas of my own, for fun projects to complete.
Today I’m going to share with you everything we did and where to find certain resources if you are getting ready to study California History too. No matter what state you live in, this can also give you some great ideas as a starting point to then tailor to your own state.
We started our first day of school by decorating our Schoolnest notebooks that we will be using for our history notebooking this year. I grabbed THIS set of California stickers and let them decorate the covers. You can read more about how we incorporate notebooking with our studies HERE.

We have been reading all week from the book Only in California by Heather Alexander and we love it! This book is so fun and filled with great facts. We will continue to use it throughout the year on specific places we study.
They each painted the California flag, from our 50 States study we completed last year. You can grab a free download of the flag to color or paint HERE.

We filled out this state information sheet with lots of quick facts all about California. Find it HERE. Then we decided to dive a little deeper into the state flower and state bird (we will be studying the state tree and animal later on in our curriculum.)

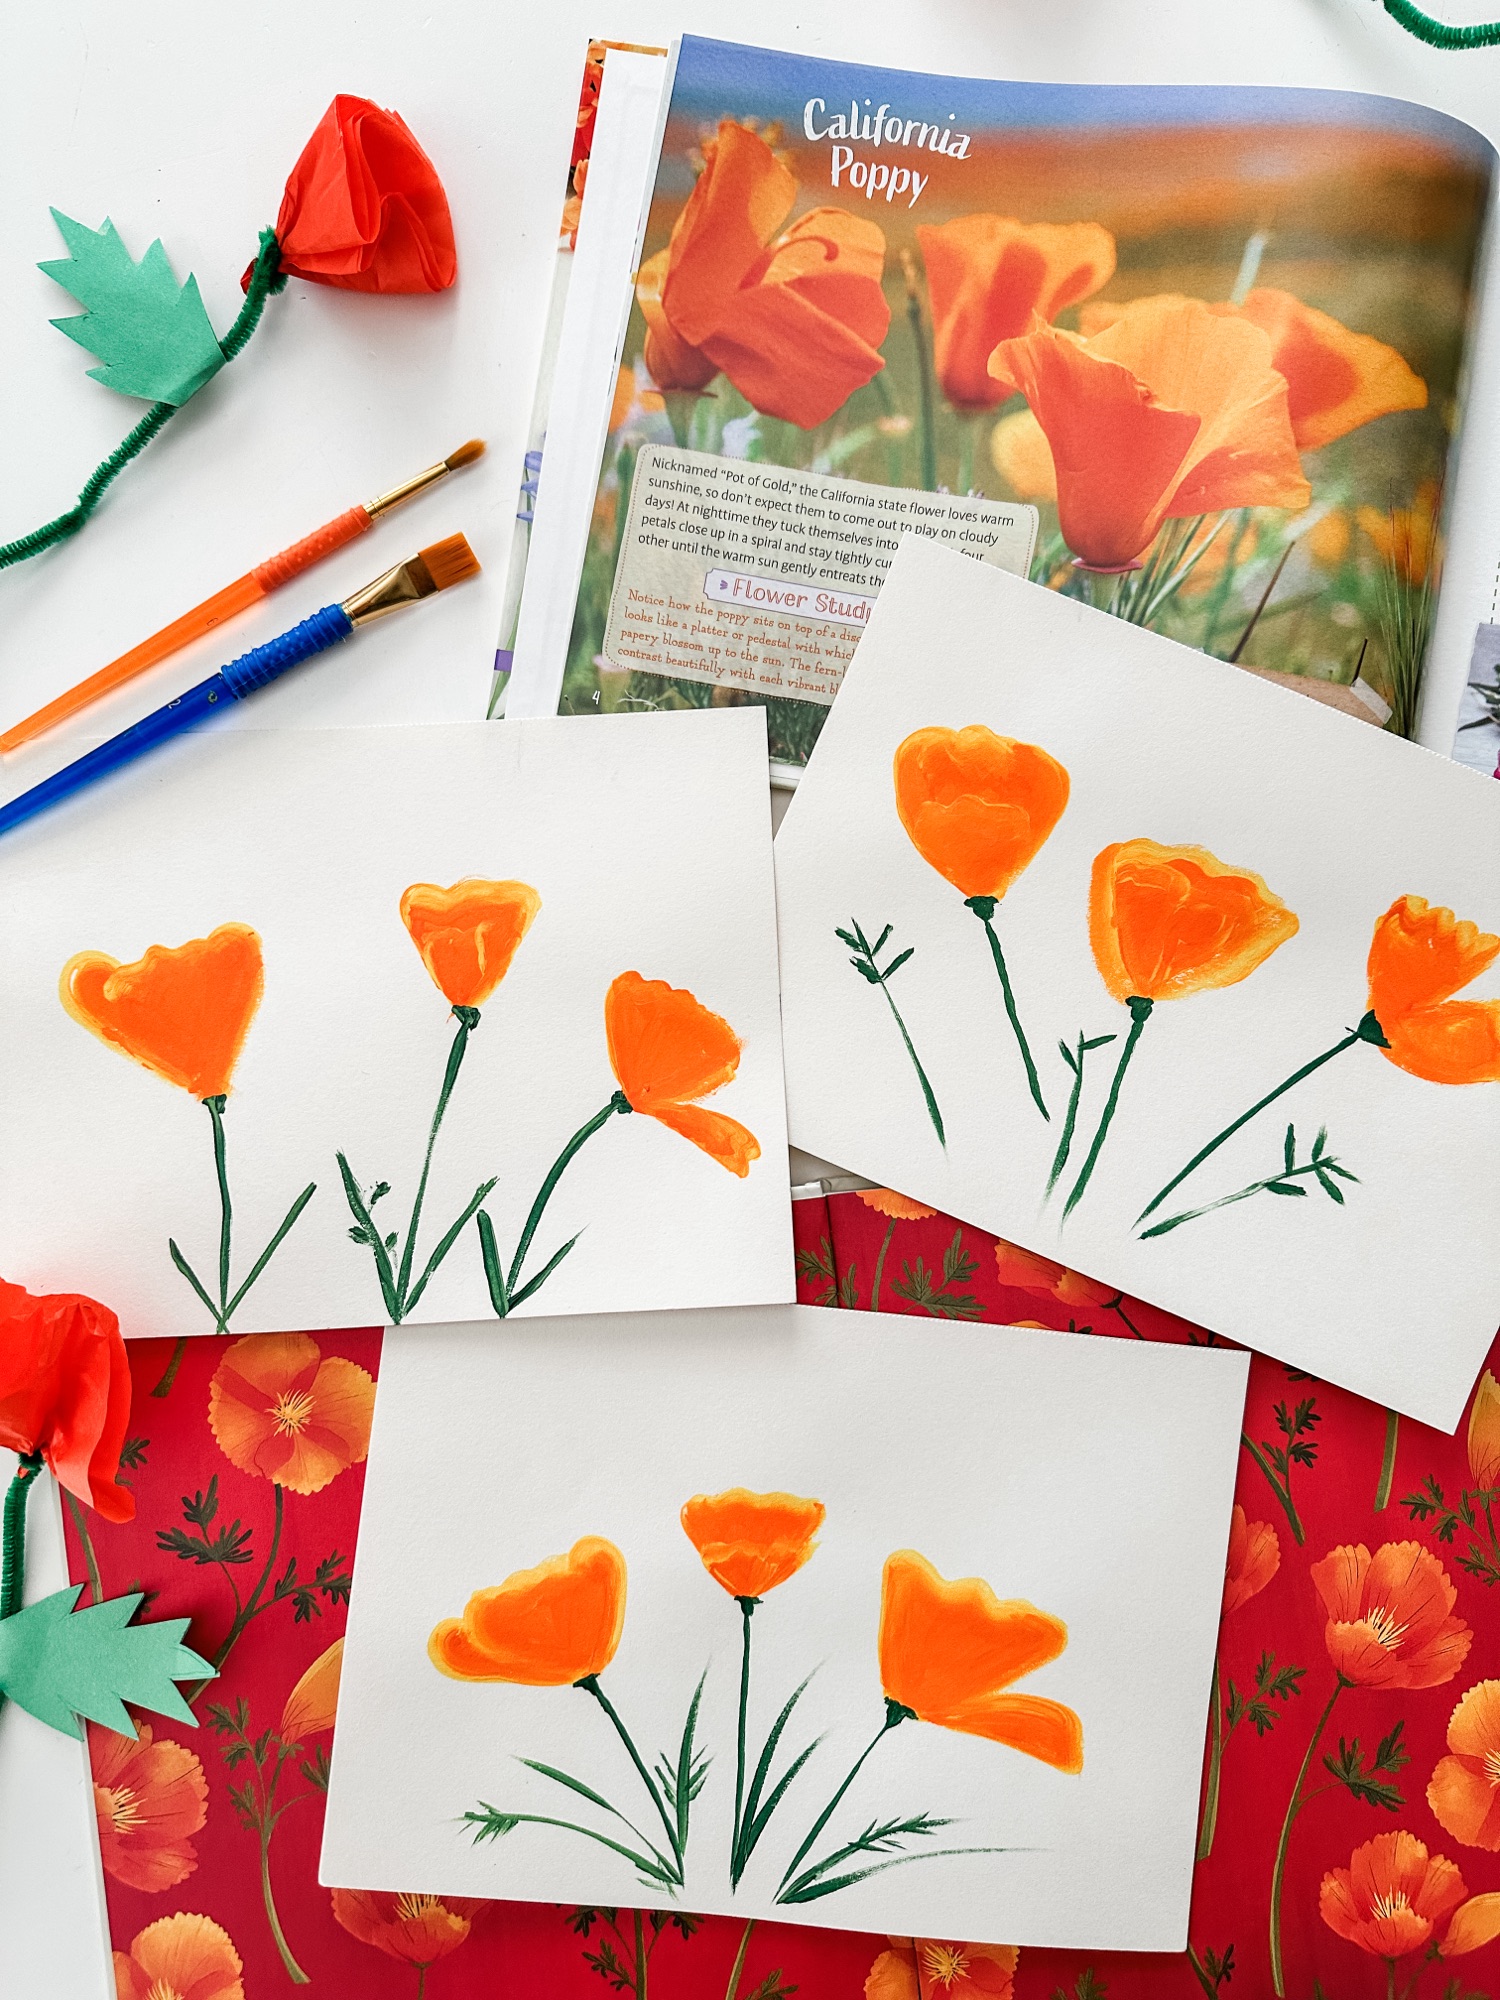
For the California Poppy we did THIS painting tutorial, learning how to use and blend acrylic paints. They really enjoyed this and they came out beautiful! We added them to our notebooks and wrote a fact or two about the California Poppy flower.

Then we made some California Poppy’s out of tissue paper. Supplies: orange tissue paper, green construction paper, green pipe cleaner. Instructions: use a small bowl to trace a circle on the tissue paper (2 layers) and cut it out. Pinch the tissue paper in the center of the circle and pull the rest of the tissue up. Wrap the end of green pipe cleaner around the part of the tissue paper you pinched. Fold a square of green construction paper in half, draw a leaf (bottom against the folded edge,) and cut it out (you’ll have 2 sides.) Place the pipe cleaner between the two leaf sides and glue them together. Fluff your tissue paper however you like it!

We also learned all about the California Quail, our state bird, and did THIS drawing tutorial in our notebook, followed by writing a few facts.

Then we pulled out the craft supplies and made some quails out of paper. I took a large bowl to trace a circle on white card stock, and then cut it out. Fold the paper circle in half for the body shape. I displayed a picture of a quail so the kids could draw and color the paper to look like one. We used a black pipe cleaner for the plume at the top of the head, black construction paper for the feet and beak, and a feather for the tail. They turned out so cute!

All week we slowly studied the 4 geographical regions of California. I found and printed THIS California Regions flip book from Teachers Pay Teachers to fill out. We did one section/page each day during the week. At the end of the week we made maps out of different dried beans to represent the different regions.

Supplies: cardboard, blue and brown paint, dried kidney beans, popcorn kernels, dried green split peas, white rice, and white glue. Instructions: We cut a large rectangle out of cardboard and lightly sketched the shape of the state in the center. Then we painted blue for the Pacific Ocean and brown for the land side. We glued the beans (mountains), split peas (valley), rice (coast), and popcorn kernels (desert) in their regions on the map. We made a simple Map Key and glued it on the side.
I love how these turned out and think they will be really helpful to refer back to when learning about the history of certain areas of California.


And that’s it! The start to our California study and a great introduction to the state. We have all our projects hung up on our bulletin board with our new California State Map. (This map is so beautiful! I love all the details!)

This week we will begin the lessons in our California History curriculum, that starts with the Ice Age. We will use the guide loosely lesson by lesson, but might add a few projects and fun art lessons along the way. I will be sure to share all the fun things we add in future blog posts!
I hope this post gave you some great ideas for studying California or inspiration to study your home state!
More to come soon!
-Lindsay
I love and appreciate all that you share with us! Thank you for taking the time to do so.
Thank you for linking the all about California sheet! What was on the first page of the notebook though? It was folded in half so couldn’t tell what it was.
It is just a map of California that is included in the Beautiful Feet curriculum. 🙂